//
// Foot Switches
// -------------
//
// Programmable foot switches.
//
// Public Domain
// February 2013
//
// Using:
// Arduino Leonardo R3
// Arduino 1.0.3
//
// Each switch is programmable with the Arduino codes for keyboard and mouse.
// The serial port (via USB) of the Arduino Leonardo is used to program the switches.
// The codes for the switches are stored in EEPROM.
//
// The simulated key is pressed as long as the foot switch is pressed.
// This is useful if a key needs to be pressed continuously, like in games and virtual worlds.
//
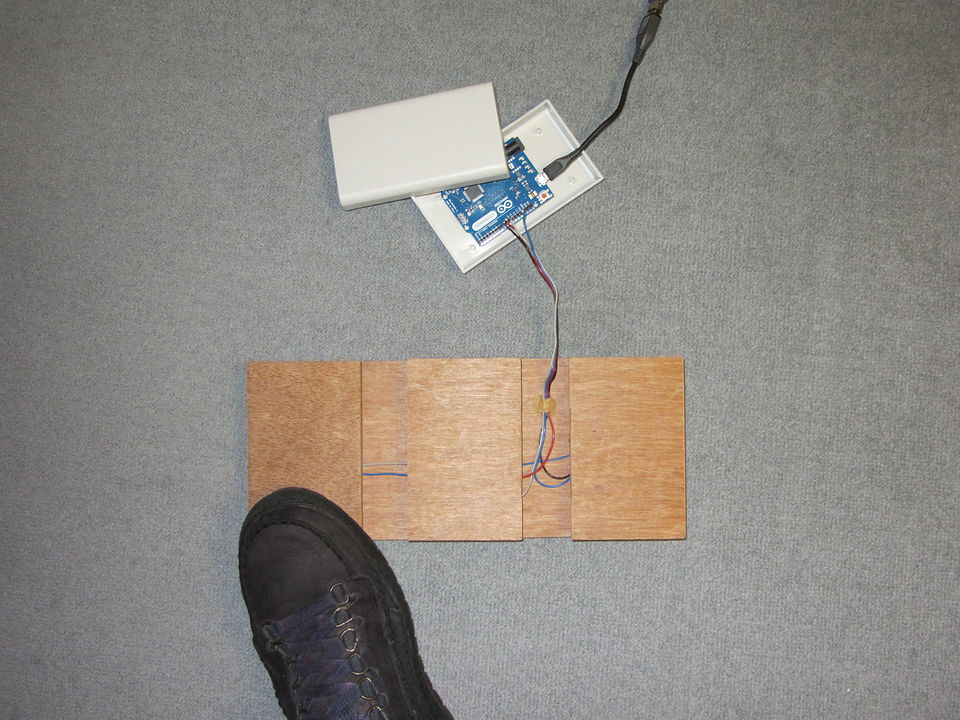
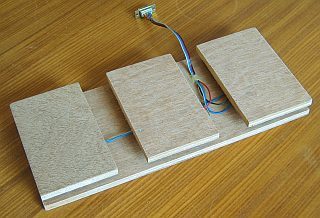
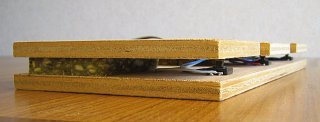
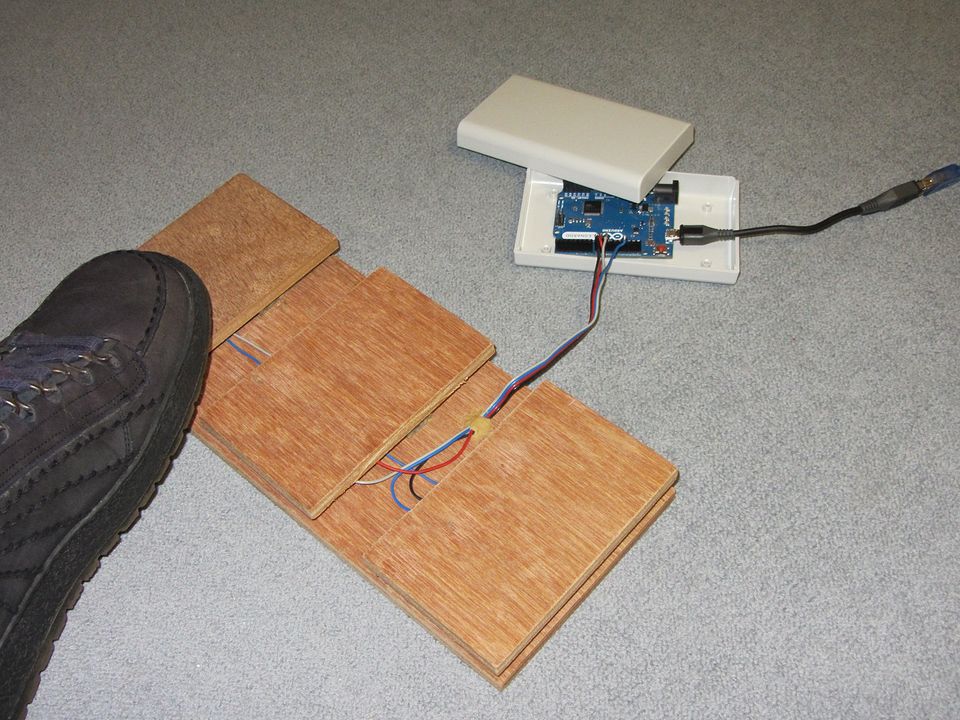
// The switches are connected to the Arduino Leonardo pins, and to ground.
// All digital pins 0 to 13 can be used, and also A0 to A5.
// Set the used pins in the code in the "pinSwitch" array.
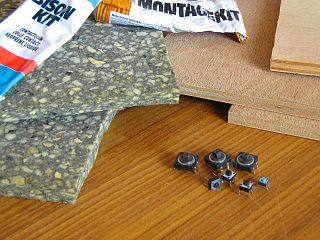
// The internal pull-up resistor is used, but external pull-up resistors of 10k would be better.
//
// To initialize the codes, send the command 'INIT'.
// Do this only once.
//
// A serial monitor or terminal program can be used to program the switches.
// Set it to 9600,8,N,1
// In a serial terminal, type '?' followed by Enter for info.
// The commands must be transmitted without delay between the characters,
// due to a very simple timeout.
//
// The command line can be used to program the switches.
// With a few command line scripts, the foot switches can be programmed for a specific task.
//
// Foot switch programming command:
// #xKKMM\r\n
// #, The '#' is used as a start character
// x, The switch number, starting from 0
// KK, The keyboard code as 2 hexadecimal numbers.
// A code from the ASCII table,
// or a special key, see USBAPI.h
// Set to 00 if not used"
// MM, The mouse code as 2 hexadecimal numbers.
// 01 is left mouse button
// 02 is right mouse button
// 04 is middle mouse button
// Set to 00 if not used"
// \r\n, Any trailing \r\n is ignored.
//
// Examples:
// #0DA00 set switch 0 to cursor up
// #10001 set switch 1 to left mouse click
//
//
// Windows, PowerShell
// Get the serial port names:
// [System.IO.Ports.SerialPort]::getportnames()
//
// Write the 'INIT' command (using COM9)
// $port= new-Object System.IO.Ports.SerialPort COM9,9600,None,8,one; $port.open(); $port.WriteLine("INIT"); $port.Close()
//
// Program a switch (using COM9)
// $port= new-Object System.IO.Ports.SerialPort COM9,9600,None,8,one; $port.open(); $port.WriteLine("#0DA00"); $port.Close()
//
// Linux
// Set the serial port baudrate (using ttyACM0)
// stty -F /dev/ttyACM0 speed 9600
//
// Write the 'INIT' command (using ttyACM0)
// echo "INIT" > /dev/ttyACM0
//
// Program a switch (using ttyACM0)
// echo "#0DA00" > /dev/ttyACM0
//
//
// Possible improvements:
// - Better debounce.
// - Better timeout for serial commands.
// - A sequence of key presses and releases per switch.
// - Repetitive keystrokes or mouse clicks while the switch is active.
//
//
//
// EEPROM usage:
// address 0 : two bytes for foot switch 0
// first byte : keyboard code, 0 if not used.
// second byte : mouse code, 0 if not used.
// address 2 : two bytes for foot switch 1
// ... and so on
//
//
#include <EEPROM.h>
#define NUMBER_SWITCHES 3 // the total number of foot switches
// Set the used Arduino pins in the pinSwitch variable
// Write your own pin numbers here for the connected switches !
const int pinSwitch[NUMBER_SWITCHES] = {10, 9, 8};
// boolean variable to remember if switch is pressed at the moment.
boolean active[NUMBER_SWITCHES];
char buffer[20]; // common buffer
void setup()
{
int i;
Serial.begin(9600);
// Set pins for switches to input.
// Use internal pull-up resistor.
// A external 10k pull-up resistor would be better.
for( i=0; i<NUMBER_SWITCHES; i++)
pinMode(pinSwitch[i], INPUT_PULLUP);
// Assume no switches are active.
for( i=0; i<NUMBER_SWITCHES; i++)
active[i] = false;
// Initialize mouse and keyboard control.
Keyboard.begin();
Mouse.begin();
}
void loop()
{
if( Serial.available() > 0)
SerialTask();
else
ProcessSwitches();
}
int SerialTask( void)
{
int i, j, keyboardCode, mouseCode;
char inChar;
inChar = Serial.read();
switch( inChar)
{
case '#':
// A command to program a code for a switch.
// Wait for all characters to get in the buffer.
// This is done with a delay, which is used as a timeout.
delay( 100);
// If not enough characters are received, ignore everything.
if (Serial.available() < 5)
return( -1);
// The next character is the ascii number of the switch.
inChar = Serial.read();
i = inChar - '0';
// Test if the switch number is valid.
if (i < 0 || i >= NUMBER_SWITCHES)
return( -2);
// Read two hexadecimal numbers for keyboard code.
buffer[0] = Serial.read();
buffer[1] = Serial.read();
buffer[2] = '\0';
// Convert ascii hex string to integer
// No error checking for non-hexadecimal characters at the moment.
keyboardCode = strtol( buffer, NULL, 16);
// Read two hexadecimal numbers for mouse code
buffer[0] = Serial.read();
buffer[1] = Serial.read();
buffer[2] = '\0';
// Convert ascii hex string to integer
// No error checking for non-hexadecimal characters at the moment.
mouseCode = strtol( buffer, NULL, 16);
// Test if the switch is pressed.
// And release it first, before accepting the new codes.
if( active[i])
{
j = EEPROM.read( (2*i) + 0); // keyboard code
if( j != 0)
Keyboard.release( j);
j = EEPROM.read( (2*i) + 1); // mode code
if( j != 0)
Mouse.release( j);
// Even though the switch is pressed, make it inactive.
// The new code will be used the next time the switches are checked.
active[i] = false;
}
// Write the new codes to EEPROM.
EEPROM.write( (2*i) + 0, keyboardCode);
EEPROM.write( (2*i) + 1, mouseCode);
break;
case 'I':
// Test for command 'INIT'
// The command is 'INIT' and not just 'I'.
// This is to avoid accidential initializing
// with bad serial data (for example if the baudrate was wrong).
// Wait for the hole command to be in the receive buffer.
delay(100);
buffer[0] = 'I';
buffer[1] = Serial.read();
buffer[2] = Serial.read();
buffer[3] = Serial.read();
buffer[4] = '\0';
if( strcmp( buffer, "INIT") == 0)
{
// reset the values for the switches
// First switch will be 'A', second switch 'B' and so on.
// The mouse code is not used, it is set to 0.
for( i=0; i<NUMBER_SWITCHES; i++)
{
EEPROM.write( (2*i) + 0, 'A' + i); // set keyboard code
EEPROM.write( (2*i) + 1, 0); // set mouse code
}
// Assume no switches are active
for( i=0; i<NUMBER_SWITCHES; i++)
active[i] = false;
// Nothing is returned to the serial port.
// Because I assume that it is mostly used with a command line script.
// To know that the initialization has succeeded,
// the foot switches can be pressed one by one.
}
break;
case 'W':
// Test for command 'WHO'
// This can be used to identify that the footswitches
// are connected to the serial COM port.
// Wait for the whole command te be in the receive buffer.
delay(100);
buffer[0] = 'W';
buffer[1] = Serial.read();
buffer[2] = Serial.read();
buffer[3] = '\0';
if( strcmp( buffer, "WHO") == 0)
{
// return string for identification
Serial.println( F("FOOTSWITCHES"));
}
break;
case '?':
// Command '?'
// A single character which can be used in the serial monitor.
// It shows information.
Serial.println(F("Foot Switches"));
Serial.println(F("February 2013"));
Serial.println(F("Compilation date: " __DATE__));
Serial.println(F("Compilation time: " __TIME__));
Serial.println(F("9600,8,N,1"));
Serial.println(F("Usage:"));
Serial.println(F(" #xKKMM\\r\\n"));
Serial.println(F(" #, The '#' is used as a start character"));
Serial.println(F(" x, The switch number, starting from 0"));
Serial.println(F(" KK, The keyboard code as 2 hexadecimal numbers."));
Serial.println(F(" A code from the ASCII table,"));
Serial.println(F(" or a special key, see USBAPI.h"));
Serial.println(F(" Set to 00 if not used"));
Serial.println(F(" MM, The mouse code as 2 hexadecimal numbers."));
Serial.println(F(" 01 is left mouse button"));
Serial.println(F(" 02 is right mouse button"));
Serial.println(F(" 04 is middle mouse button"));
Serial.println(F(" Set to 00 if not used"));
Serial.println(F(" \\r\\n, Any trailing \\r\\n is ignored."));
Serial.println(F(" Examples:"));
Serial.println(F(" #0DA00 set switch 0 to cursor up"));
Serial.println(F(" #10001 set switch 1 to left mouse click"));
Serial.println(F(" ? : Show this info"));
Serial.println(F(" INIT : Initialize codes to 'A', 'B', ..."));
Serial.println(F(" WHO : Returns \"FOOTSWITCHES\""));
default:
break;
}
return( 0);
}
void ProcessSwitches( void)
{
int i, j, p;
for( i=0; i<NUMBER_SWITCHES; i++)
{
// If the foot switch is pressed, the input is LOW.
// So LOW is active.
p = digitalRead( pinSwitch[i]);
if (!active[i] && p == LOW)
{
// Switch has been pressed.
// Send the codes from the EEPROM.
j = EEPROM.read( (2*i) + 0); // keyboard code
if( j != 0)
Keyboard.press( j);
j = EEPROM.read( (2*i) + 1); // mouse code
if( j != 0)
Mouse.press( j);
active[i] = true; // remember switch is pressed
delay(20); // for debounce
}
else if (active[i] && p == HIGH)
{
// Switch has been released.
// First the mouse button is released, and after that the keyboard.
// That is the best order for example for Ctrl + mouse click.
j = EEPROM.read( (2*i) + 1); // read mouse code
if( j != 0)
Mouse.release( j);
j = EEPROM.read( (2*i) + 0); // read keyboard code
if( j != 0)
Keyboard.release( j);
active[i] = false;
delay(20); // for debounce
}
}
}